About this deal
If you make one for a baby, just make sure to adjust the size down so the baby doesn’t end up with fabric over their face. I would probably leave off the hood too. You just want to be cautious about baby overheating or suffocating. Now it’s time to take the 2nd square and place the Poncho front V Negative on the top corner and cut it out (seepicture). Then with the frontpiecewe’re going to take one more additional step of taking out ruler and rotary blade cut the square in halfusingthe bottom of the V and bottom corner to line up your ruler, making two triangles.
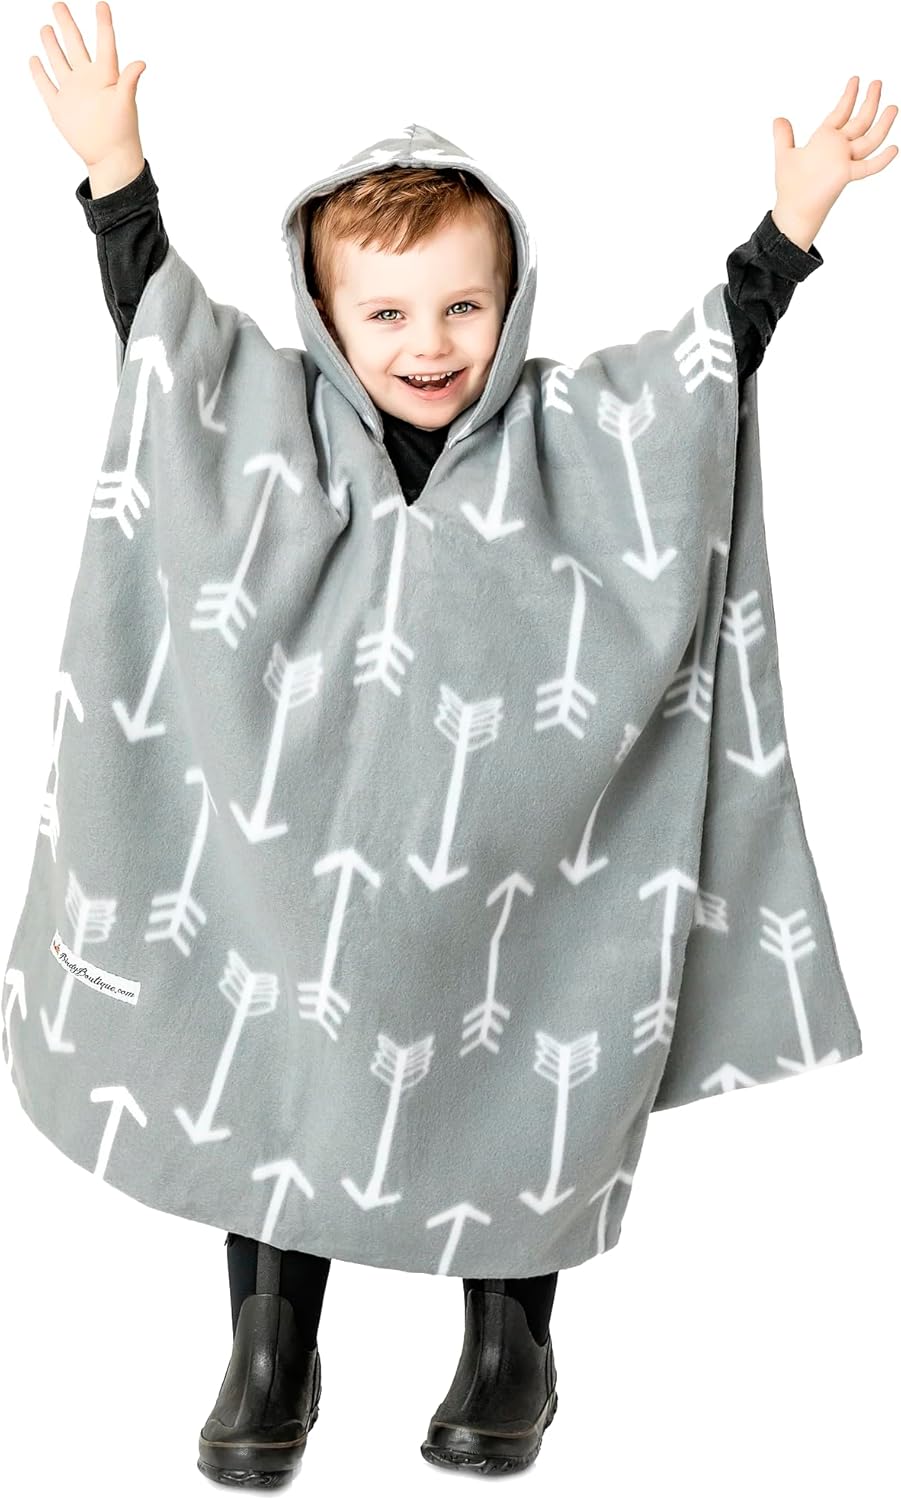
Free Sewing Pattern: This child Car Seat Poncho Pattern is perfect going out and about – it’s so soft and comfortable like wearing a favorite blanket! Free pdf pattern and step by step picture tutorial included to make this cute and functional cape. I have seen this question being asked a lot. I think it’s feasible to make a no sew car seat poncho if you leave off the hood. You can use a separate hat instead of a hood. After you grab the pattern print out your desired size. I suggest size 2 for children 6 months to 24 months, size 4 for sizes 2T-4T and size 6 for 4T-6. In my opinion the height chart in the pattern is more accurate than the suggested ages. Assemble the pattern according to the directions in the pattern tutorial.
Step 8 – sew lining to the child cape.
Finally, weave in the ends. Since I used three strands of yarn, I did have a lot more ends to weave in. It was worth it though! Fleece. You’ll want an inner fabric and an exterior fabric (if you live in a warmer climate, you could probably use just one layer). I could have used 1.5 yards easily for this, but I’d bought 2 yards to be safe. The fabric I usedfor the Star Wars poncho can be found on Fabric.com. I would go with a single layer fleece. You can finish all of the edges with bias tape. It would be easy to do and be similar to those zippered fleece coats most kids wear for warmer cold days. With right sides together pin the two hoods together, making sure the seam at the top lines up on bothpieces. Using a walking foot sew the two together using a .5 inch (1.25cm) seam allowance. Turn hood right side out and set aside. Step 6 – sew the outer body of the cape together Thank you so much for taking a look at this project! I hope it helps you crochet whatever size poncho you’d like and that you’re own project turns out amazing! Feel free to let me know how it goes or reach out if you run into something I didn’t cover well enough. I’m happy to help and update the information too!
rectangular pieces of fleece 38in x 28in; choose 2 different prints if you want the reverse to be different (about 1.5 yards total) Fold the car seat poncho in half to find the center of the front, then cut a slit (I cut about an inch and a half). Sew around it close to the edge just to keep it from fraying. It doesn’t have to be pretty because it will be covered! Then cut a diamond shape out of your fleece material the same width of the opening between the two edges of the hood. Here’s a few products in my store that you might enjoy! Keep scrolling for the poncho tutorial! DIY Kids Carseat Poncho Supplies This darling hooded car seat poncho for toddlers turned out SO ADORABLE. I’m so glad I stepped outside of my sewing comfort zone on this! My kids would happily go naked in 60 degree weather so I haven’t made a lighter weight coat, but I’ll give you my advice here.Hem around the circle for the head hole too. Then lay it over the fleece circle and try to get it as centered as possible. This is a good time to think about whether there’s an ‘up or down’ to the print. Pin it down along the seem every 4-5 inches, then sew the two layers together right over the existing seam. I used a zigzag stitch so it would be a little forgiving, just in case I didn’t follow the line perfectly.
Note: MAKE SURE THAT THE RIGHT SIDES ARE TOGETHER AND IF YOU HAVE DIRECTIONAL PATTERNS MAKE SURE THEY ARE FACING THE RIGHT WAY UP WHEN YOU CUT. IF YOU DON’T DO THIS YOUR HOOD WILL NOT GO TOGETHER CORRECTLY. NOW it’s finally time to cut out the circle of fleece! Cut it slightly smaller than the existing hole, because I’m going to hem them over too. Sew slowly about 1/8 inch from the edge, or whatever makes you comfortable, and use your finger to guide the fabric. I usually have to pinch the edge and guide it in to make sure that the seam is out as much as possible. See step 5 photo. You can pin the opening and slow down when you get to it as it may take extra finagling to line up the edges; or you can just eye it and go for it. Step 6. Sew Around Hood Opening And while we are on the topic of pom-poms, please know that you can make them any way you want. Although there are special pom-pom makers, I still prefer to use a simple homemade pom maker like the one in this tutorial. The pom poms I made for this crochet poncho were all made on a 1½ inch form, but for the pom-pom that was going on the hood I wrapped the yarn several more times so that it would be a bit bigger. Finishing
Step 8 – sew lining to the cape.
Lay out your solid color ‘linen’ fabric (after ironing if necessary), and lay the fleece circle on top. Cut around the edges so you have two identical-sized circles. Please share your creations with us! We hope that you enjoyed making this project and came up with some great fleece combo ideas! The possibilities are endless; think baby shower gift, kids birthday gift, Christmas gift, etc. Which patterns and print combinations will inspire you? Turn right side and sew gap shut. Optional – top stitch all the way around the cape using a .25 inch (.5 cm) seam allowance. Step 9 – add button and button hole. Winter parkas should NOT be used in car seats. In an accident, they can compress and the child can be ejected from the car seat. They are not safe. Here’s some great information from Safe Ride 4 Kids about the safety issues with winter coats. With right sides together, pin and sew together. Take extra care to line up the seams at the top. Take the two exteriorpiecesand sew together using a .5 inch seam allowance. This can be done with a walking foot to help with the bulk especially just over the ears. Repeat with the lining. Step 5 –Sew the hood exterior and lining together
I needed to cut a hole for the head, but I wanted to be really careful not to make it too big… because that can’t be fixed! You can always make a hole bigger later, but smaller? Not so much! STEP 7. Cut out hood pieces. Fold the fleece in half, right sides together, so you have two layers. Thankfully the best search engine to ever be created (at least for visual people) was publicly open by now and I stumbled upon this tutorial for a fleece car seat poncho. I made one for each big boy and once Mercedes got big enough I made one for her. I also made one for our niece and will probably make one for our other nephews as well at some point soon. They make life so much easier! There is no fabric between the child and the straps so safety isn’t affected and because it is worn over the head it also isn’t going to fall off like a blanket could. STEP 6. Sew around the hood opening. Choose a loose zig zag stitch for this part. All you are doing is closing up the two layers so that it is easier to sew the hood on. You will have to do a lot of shifting of the fleece to ensure that the layers stay even. If it’s easier, go ahead and pin to keep the layers in place. I usually start this about an inch down from the bottom of the opening and go up and around. I sew right over that same inch on the bottom to make sure there is no unraveling. Step 7. Cut Out Hood Pieces Thank you so much for pinning and sharing your inspo. How were these directions? What would you like to see a tutorial for next; a circular or rectangular poncho, a no sew tie knot version, adult hooded blanket, etc.? Please tag us on social media or send us photos of your proud work. Feel free to ask us any questions below; we are happy to help!Buy two pieces of fleece in the sizes you need. This will ensure your poncho is nice and warm as well as reversible! Step 2. Fold fabric Note: Measurement I used for the length of my poncho was 23″… my video has instructions on how to adjust if needed, but this measurement has worked well for my kids. I have a feeling a LOT of you are going to be making one of these car seat ponchos for toddlers for your little one, so be sure to send me pics or tag me on social media! (@RealityDaydream) …I can’t wait to see how yours turns out! It also means nothing is interfering with the function/strength of the car seat straps. Sizes Car Seat Ponchos for Babies The solution to this problem is to use a car seat coat. It keeps kids warm while running errands. Your child can be strapped into their car seat underneath the poncho… which means they can easily get it on and off if they get hot (assuming they’re old enough and agile enough to do so). How to Use a Car Seat Poncho
 Great Deal